Shipyard’s 30th Anniversary Collections

2015 marked the 30th anniversary for the paper model manufacturer Shipyard. To celebrate, Shipyard created some new model collections. Each collection includes two or more ship model kits from their Paper Model series.

We got these in earlier this year, and finally got them posted on the Ages of Sail website. These sets offer a savings of up to about 25% off the cost of buying the kits individually. So, if you like building models, this is a way to really get started on some models for less than $100.

Want to know more? Check out the pricing and details of these and other Shipyard kits at Ages of Sail:

http://www.agesofsail.com/ecommerce/paper-kits/30th-anniversary.html

We now have sail and masting sets for each of the models. These are sold separately, but can be found at Ages of Sail:

http://www.agesofsail.com/ecommerce/paper-kits/sails-and-accessories.html

Shipyard Sail and Masting Accessories – Now at Ages of Sail

If you’re familiar with Shipyard products, you probably recognize the fact that their line of Paper Model ship kits only contain the paper parts necessary to build the model. They kits give you drawings for proper dimensions of the masts and spars and patterns for the sails, but don’t include material needed to build them.

These materials are easily obtainable at fabric stores and hardware stores. But shipyard also produces separate accessory sets so that you don’t have to make the sails or hunt down the proper size dowels and such.

Now, Ages of Sail has made these accessory sets available, and you can find them on our online store: Shipyard Sail and Masting Accessories

These sets are available only for the 1/96-scale Paper Model ship kits. They are the equivalent of what Shipyard already includes in their boxed 1/72-scale Laser Cardboard series kits, but of course, at a different scale.

Sail Sets

The sail sets include all the necessary sails for your paper model. The sails are laser cut, with details laser etched onto the fabric. All you need to do is add the bolt ropes, which are included in the sets, and mount them onto your model. For some models, an optional studding sail set is also available.

Masting Sets

The masting sets not only include all the dowels you will need to complete your ship model project, but also include laser-cut card stock parts for the cross-trees, mast tops, and yardarm details to replace or supplement the printed parts in your paper model kit. These will save you lots of time, as the parts are all pre-cut and ready to use.

See our growing selection of Shipyard products at Ages of Sail!

The Crowdy Head Lighthouse – A Shipyard Card Model, Part 2

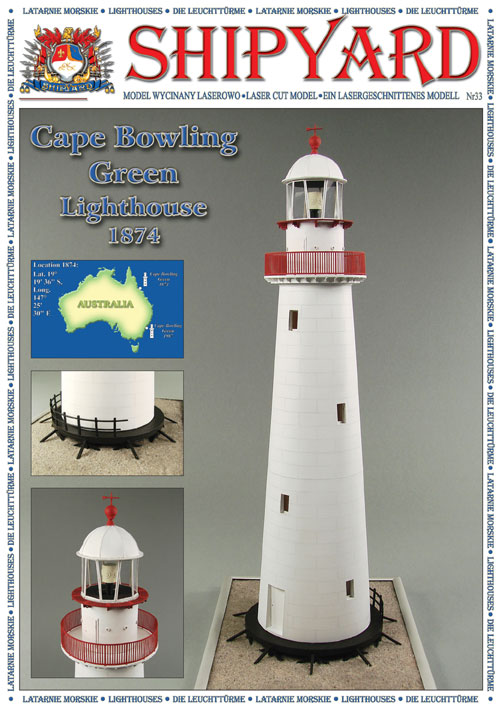
Welcome to part 2 of the article on building Shipyard’s Crowdy Head Lighthouse card model kit. Ship modeler Clare Hess describes some of his experiences building this Laser Cardboard Kit.

img_2434

1/72-scale Crowdy Head Lighthouse model by Clare Hess


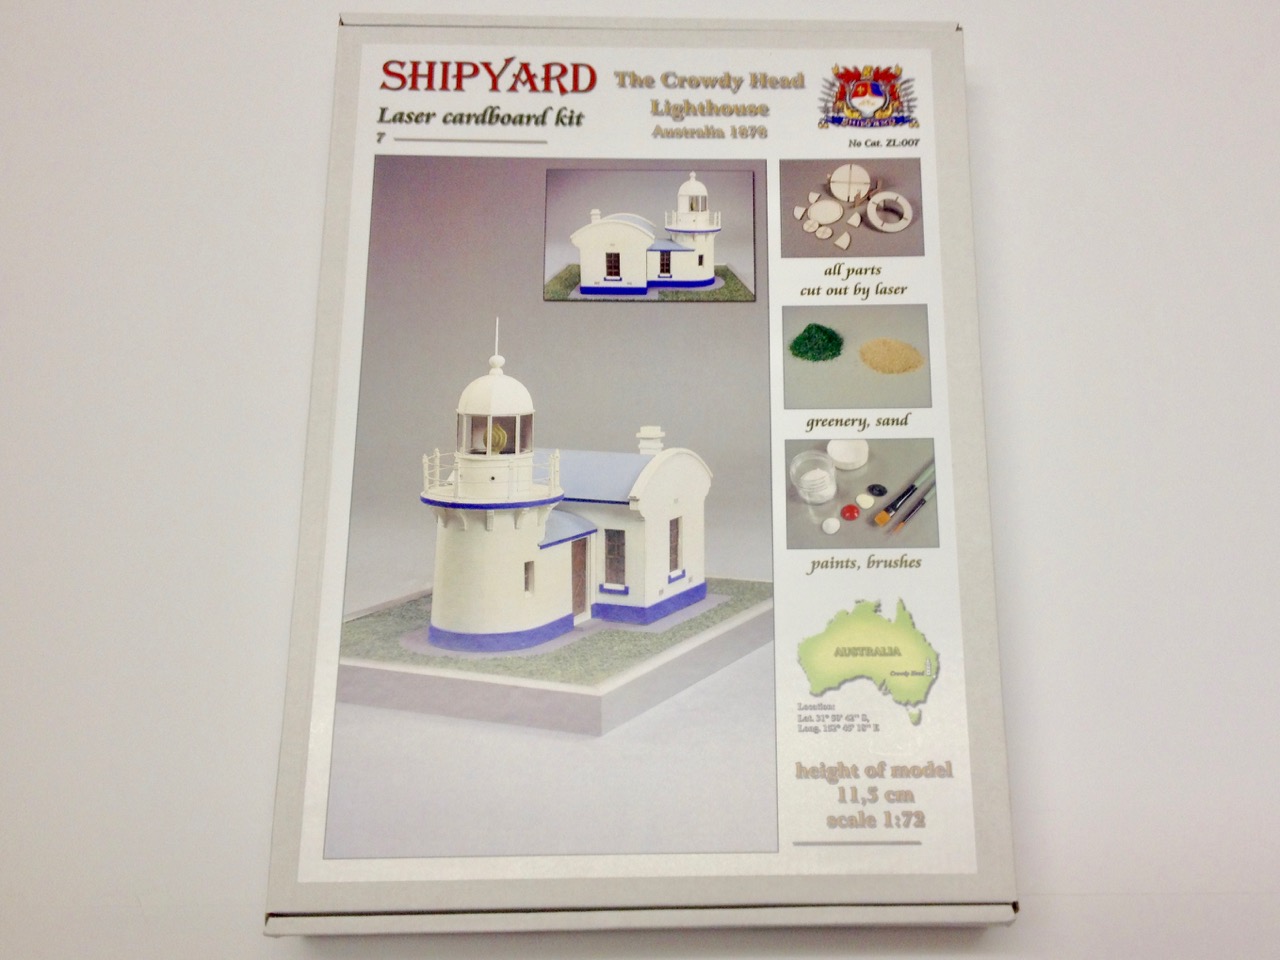
To recap from my previous post, this is my second completed paper model. The first was the British naval cutter HMS Alert, which I build from Shipyard’s line of Paper Model kits. The Crowdy Head Lighthouse kit, I chose from Shipyard’s Laser Cardboard Kit line because it is not all that much more expensive than the other versions of this model, plus it includes paints, brushes, and landscaping material consisting of fake grass and real sand.

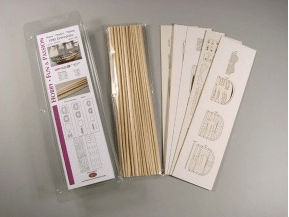
The kit provides all the paper parts pre-cut, which is a big time saver, and ideal for people who don’t mind paying a little more money for a simpler project. This model took me about three weeks to construct, though I only worked on it a bit at a time.

Construction begins very simply, as the thicker card stock pieces fit together quite cleanly, and your model become 3-dimensions very quickly.

By the way, don’t every punch out the card stock pieces unless you want an ugly looking model, you bend, crease, and damage the integrity of the card stock. Always cut with a sharp knife, the sharper and thinner, the better. I often use a scalpel, but for this model, I found a #1 handle hobby knife worked well, just make sure your blades are sharp.

Also, if you don’t have one, get yourself a cutting mat. The one shown is a Fiskars brand, which I picked up at Michael’s craft store, but Ages of Sail carries the Modelcraft Tools brand that includes a large range of sizes. You don’t really need anything big for this model, so the small or medium sized matts should do fine.

img_2399

For glue, I used Aleene’s Tacky Glue almost exclusively. This stuff is like a thick Elmer’s white glue, and it was a pleasure to use – I highly recommend it. But, get the 4 oz bottle, not the little 2/3 oz ones that come in a the multi-packs.  I picked up the stuff at Ace Hardware, but you can find it at most fabric or craft stores.

th

Later on, there are some other glues that will prove helpful, specifically thin cyanoacrylate or CA glue, which is useful for strengthening small pieces made of thick card stock. More on that later.

You’ll need to do some painting pretty quickly. The doors and window frames need to be painted before mounting and you can do that right on the laser-cut sheet. Don’t worry about glue not sticking to paint. I found that Aleene’s holds well, at least to the paint that’s included in the Shipyard boxed kits.

img_2402

Now, on the matter of the Shipyard paint, it appears to be the same stuff they used to include in sealed tubes, which was an artist’s acrylic brand from Poland called Renesans. They’re now in jars, which seem to dry out a bit on the shelf. If this is the case with your model, not to worry. I found that adding water and stirring the paint worked very well, though it took a bit of stirring on my kit to even it out.

Now, I’ve used various brands of paints, but I have to say that I REALLY like this stuff. It dries to a matte finish and has a little bit of transparency to it, so if you paint over printed parts with a thin coat, you can still see the printing. I used it on my HMS Alert model and thought it worked very well on both paper and wood surfaces. The only problem is that the brand is not sold here. But, if you buy enough of these boxed kits, you should end up with a small supply.

You’re going to have to mix the paint a bit. The brown paint is VERY dark and you might want to lighten it up a bit with one of the provided colors. The same is true later on for the lighthouse’s blue trim.

Now for the windows, the kit includes a small sheet of clear acetate film. You can easily cut this to size with scissors. Gluing these into place, I used just a small touch of Aleene’s at the outside edges, top and bottom, keeping it from marring the window surface. When dry, I applied more to the sides. Don’t worry too much about the appearance of the edges of the window frame as they’re applied from the inside of the walls and are hidden from sight. The same is true of the doors.

img_2400

img_3323

img_3326

The biggest issue I ran into was just making sure to double check that you got the right piece on in the right direction. There are a number of pieces that look very similar and it can be a little confusing. So, look carefully at the directions.

If you cut a part free and it does not have a part number you may want to lightly mark it in pencil on a side that will not be visible on the completed model. This is particularly true with the parts that have the same shape. Of course, you don’t want to remove anything from the laser-cut sheets that you don’t need to, but sometimes they pop loose on their own.

img_3327

Instructions

The instructions in these boxed kits seem to be better than for the Paper Model series kits, though I have to admit that I’ve only seen the Paper Model series of ship models.

img_3314

I showed this same image in my previous post, but it bears looking at again. As you can see, the instructions have essentially no text, but outline all the steps clearly in detailed diagrams. The asterisk (*) next to a part indicates that it should be painted prior to assembly, and the letter F indicates a piece of clear acetate.

Some parts may be hard to find, but they’re there, somewhere on one of the sheets. Particularly difficult are the door knobs. But, honestly, I found them so hard to cut free from the laser sheet that I ended up destroying some and giving up. If I want door knobs, I’ll use pin heads. This was a detail I simply chose to omit.

Details like the window sills, I found to be a bit confusing, but the photos of the completed model helped a lot and it all made sense in the end.
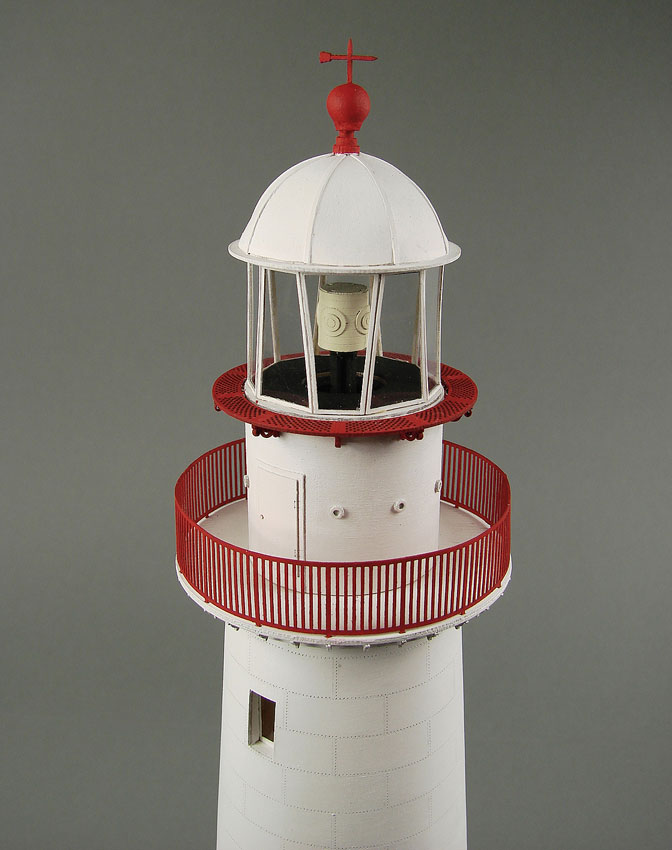
img_3366

The Light

I think the hardest features of the kit include the railing around the light and the assembly of the windows of the light. The window frames are very thin and delicate. What I learned was to use scissors to carefully cut the frames free. Cut close to the laser-cut line and the exertion will generally pop the laser-cut loose, nice and cleanly. If there’s a little extra, don’t worry about it.

Lay the frames out on the acetate piece on a flat and level surface, then take some liquid floor finish, they used to call it Future but now it’s Pledge Floor Care Finish (you can buy it at hardware stores or the grocery store, though you may have to look around for it), and drip it onto the acetate, so that it fills the frames. Let it dry as long as it takes. The floor finish will seal the frame and the glass together… and just look at that shine!

85263135When it’s all dry, you can then use scissors to cut free the frames with their windows attached. Then, you can glue them to the model using the Aleene’s Tacky Glue. I’m sorry I don’t have any photos of the process, but it’s pretty straight forward. Just keep in mind that any contaminants in the floor finish and on the window will be permanent fixtures.

Now, dealing with the railing, the stanchions are all laser cut, as are the holes for the wire railing provided in the kit. However, getting the wire into these holes will require you to drill them out. I don’t recall the size of the bit, probably something between a #72 and a #68.

The problem you’ll run into is that the cardboard will want to come apart if you start drilling it. This is where the thin CA comes in handy. After cutting the parts free from the laser-cut sheet, carefully touch some thin CA into one end of the stanchion, just be careful not to get whatever your holding the stanchion with glued to the stanchion.

If you take a straight pin and poke it securely into the hole for the railing (do this by laying the part on the cutting mat so you don’t bend up the part), you can probably hold it enough to allow you to wick the CA into the part. After the CA has dried, you’ll find the card stock piece much stiffer and easier to drill.

Now, I used a pin vise for drilling, but still ended up bending up some of the stanchions. I suspect a high speed drill, like a small hobby drill press or a rotary tool is less likely to cut the hole more cleanly and with less stress on the part. In any case, like I said, I had a few bent stanchions, but I made due anyway. Once on the model, you can straighten those things out a bit.

Next, you can just thread the wire through all the stanchions, then space them out to fit on the lighthouse deck and glue them down carefully. You’ll need to cut away any excess wire, and try to get the ends cut close to a stanchion, so you can use some gap filling CA where it won’t be so noticeably.


I’ll leave the painting and landscaping to the kit instructions and your own sensibilities. I will just say to use light coats and don’t soak the paper, as it will wrinkle or get soggy. Let things thoroughly dry first if you intend to add another light coat.

This was a fun and interesting project and a nice, quick diversion from wooden ship modeling. It is the smallest of the Shipyard lighthouse kits, and I think it makes a great starter kit – a perfect introduction to paper models and to modeling in general.

Here are some photos of my finished model. I intend to mount it on a nice wooden base. I hope you’ll try out one of the Shipyard kits, even if it’s not a lighthouse. Check out the ship kits and the quay port dioramas at Ages of Sail, the US import for Shipyard products.

img_2436

img_2435
img_2434

img_3384

img_2450

img_2451


The Crowdy Head Lighthouse – A Shipyard Card Model

On our blog here, ship modeler Clare Hess will be taking a look at one of the more unique lines of model kits carried by Ages of Sail: Shipyard’s 1/72-scale Laser Cardboard kit of the Crowdy Head Lighthouse.

zl007-crowdy-head-lighthouse


Article by Clare Hess –

I’ve completed one paper model sailing ship, but always thought the lighthouse kits from Shipyard were interesting looking. The Crowdy Head Lighthouse is, I believe, the smallest of the lighthouse kits available, and the least expensive. I chose this kit, in part, because I have a lot of projects on my plate and I really wanted to do a write-up of one of these kits, so I picked one that seemed fairly simple to construct.

Crowd Heady Lighthouse photo from Wikipedia

Crowd Heady Lighthouse photo from Wikipedia

But, I also wanted to find something simple because I want to figure out if this would make a good introduction to paper/card models, or even a good introduction to model building in general. After all, few people have tried one of these Shipyard kits, and I think they’re pretty neat kits that a lot of people would enjoy building.

Different Lines of Kits

As with nearly all the subjects in the Shipyard line of kits, there are actually 4 different versions of the Crowdy Head Lighthouse kit. This selection makes things a little confusing.

  • Laser Cardboard Kit, 1/72 scale
  • Laser Cut Model, 1/72 scale
  • Laser Cut Model, 1/87 scale (HO)
  • Paper Model, 1/87 scale (HO)

Basically, Paper Models have pre-printed parts that you cut and glue together and they are very inexpensive. Laser Cut Models require you to paint the model, but the parts are all laser-cut for you from appropriately sized card stock. Laser Cardboard Kits are basically Laser Cut Models, but include paints, brushes, and greenery, all in a nicely boxed package, and are the priciest choice, but can easily be the best value.

For a relatively small model like this, there isn’t a huge difference in price between the range of kits, so I figured $37 was good. After all, it includes 5 jars of paint, plus it comes with greenery and sand, and a couple nice quality paint brushes. All of that is probably worth the $15 price difference from the 1/72-scale Laser Cut model version.

The Kit

The Laser Cardboard Kit comes in a neat package. Having built other Shipyard kits, I can attest to the fact that the box is VERY handy for keeping your parts safe until you need them.


img_3311

Inside, besides all the part sheets and instructions, a little cardboard caddy at the top of the box keeps your paints neatly organized.

img_3312

The numbers and color chip identify each of the colors, but there are no other labels. In fact, the kit instructions don’t identify the colors you are to use on the model, but it does provide a nice set of color photos as a guide.

The paints provided in the kit are excellent quality and I really like using them on paper models. They are water-based artist’s acrylics of a brand called Renesans that’s made in Poland.

The paint has a slightly coarse texture when it goes on, giving a nice flat finish. The paints are also not totally opaque, so if you don’t apply too heavy a coat, you can see the pre-printed or laser-scribed lines through it. Some kits, perhaps only older ones, provide tubes of paint. This kit, and most of the Laser Cardboard Kit series that I’ve seen lately, all provide paint in jars.

There is good and bad to this. The jars make it easier to work directly with the paint, but I find it’s best to apply the paint onto a piece of glass, where you can easily thin and mix paints as needed. The downside of the jars is illustrated with the kit I bought, where the paints were partially dried out. Fortunately, this paint revives perfectly with the addition of water and some thorough stirring.

With a limited selection of colors available, you’ll find that you have to mix colors to get the exact shade you want. It may take a little practice to match colors, but there’s plenty of paint in the kit to experiment with.

Parts

If you’ve never seen one of these laser-cut kits, they are really fun to look through. The detail and precise cuts really make you want to just start building.

img_3316

There are a couple different thicknesses of parts. Most of the structural parts are cut from a heavy card stock. Parts that make up the lighthouse’s facade are cut from thin card stock, with heavy use of laser scribing to create textures and details.

The window frames, in particular, are a bit tricky to work with as they are very thin, so you want to make sure that you work with a VERY sharp, thin blade. A lot of Laser Cardboard Kits even come with a razor blade, but not this one. That’s just as well, because I would want something to recommend for kids, and that wouldn’t be a kit that includes a razor blade.

Still, you’ll need a sharp hobby knife, or even a scalpel, which is a lot thinner and sharper, and make sure to carefully “chop” through the tabs that hold the part to the sheet.

That brings me to one of those items you don’t want to be without if you’re building one of these card/paper kits, and that’s a cutting mat. Ages of Sail carries a nice selection of self-healing cutting mats from Modelcraft Tools.

img_3320

Other items in the kit include wire for hand rails and a piece of clear acetate for the windows.

img_3313

There’s also bags of fake sand and grass to landscape your completed model when it’s done. Finally, there are a pair of very nice quality brushes included, which I really liked using.

Instructions

Of course, no kit is complete without instructions. If you’ve ever built a paper model kit before, you’re probably accustomed a general lack of written instruction. If not, you want to get used to building by diagrams and part numbers. Fortunately, for a relatively simple subject like a small lighthouse, it’s not difficult.

img_3315

There is some written instruction included, but it’s mostly just there to tell you to build the kit in the order of the part numbers, and to pre-paint any parts marked with an asterisk (*). It does this in English, Polish, and German.

Again, there is no paint guide, but there is a very nice color photo page.

img_3314

As I mentioned above, building is basically by the numbers. Just look very carefully to make sure you know whether a part glues onto the edge of another part or on TOP of the edge, etc. Test fit, and look carefully ahead in the instructions. Find your parts, and don’t cut out anything that you don’t need yet.

Next Time, I’ll post some pictures of the build and describe some of the challenges I came across in building the model…

Ages of Sail and Model Craft Tool Shop Grand Opening, Saturday May 14, 2016!

If you’re anywhere near the Bay Area, you’re going to want to mark this on your calendar. Only two weeks away, Ages of Sail is officially opening it’s all new store!


Ages of Sail and Model Craft Tool Store

IMG_2208

Grand Opening!

Saturday, May 14, 2016

Time: 10:00 AM to 2:00 PM

  • Free Refreshments
  • Door Prizes and Raffle
  • 10% Discount on all In-Store Purchases
Come Join Us! Bring a Friend!

Where: 676 Bockman Road, San Lorenzo, CA


Questions? Call us at 510-889-6000

or email us at

agesofsail@gmail.com


Join us and local Bay Area ship modelers in celebration of the new Ages of Sail and Model Craft Tool Shop!

Check out aisle after aisle of wooden ship model kits and RC kits, multimedia kits, and paper kits, ships in bottles, cross-section models, ship modeling books, Amati ship model fittings, Billing Boats ship model fittings, craft tools, jeweler’s tools, specialty ship modeling tools, Proxxon power tools, glues and accessories.

Plus architectural kits, replica swords, and more!

And be sure to take advantage of our special, one day, Grand Opening In-Store Discount and take 10% off that ship model kit you’ve been waiting to get.


IMG_2208

IMG_2205

IMG_2204

IMG_2203

IMG_2202

IMG_2201

Find the right tool for those tricky tasks, stock up on supplies, get those anchors you need to finish your model, pick out your next project…

IMG_2211

IMG_2206


Find just the right kit for your next project or that kit that you read about online or in a magazine…

We carry kits from: Amati, Artesania Latina, Billing Boats, BlueJacket, Caldercraft, CCV Model, Constructo, Corel, Cottage Industry Models, Deans Marine, Domus Architectural Models, Dumas, Dusek, Euromodel, Flagship Models, Krick Models, Mantua/Sergal/Panart, Mount Fleet, Nordic Class Boats, Occre, Saito Manufacturing, Shipyard, Soclaine, and Turk Model.

We even have some hard to find, out of production kits from Mamoli and Yankee Model Works.

Don’t know what any of these product lines are? Come by and check them out. You may discover something you’ll really like.

Lighthouse card model kits listed

We just started updating our listings for card model lighthouse kits from Shipyard of Poland. It’s been long overdue and we’re just started to get a handle on it. Shipyard produces about two dozen different lighthouse kits in both 1:72 scale and 1:87 (HO) scale and we have nearly all of them in stock now from their Laser Cut Models series as well as their boxed edition Laser Cardboard series.

bowling

Cape Bowling Green Lighthouse, built in Australia in 1874.


These are NEAT kits! All the lighthouse kits we carry are the laser cut kits that Shipyard produces. They also have cut-out kits, where the parts are printed and you have to cut them all out. But, for now, we’ve decided to focus on carrying just the ones where the parts are all pre-cut for you. You just need to cut off the tiny tabs that hold the pieces to the laser cut sheets to release them. You just need to glue, assemble and paint.

The kits are available in either HO scale 1:87, or 1:72 scale. They vary in size from the short Crowdy Head Lighthouse, which is just about 3-3/4″ tall at HO scale, to the towering Pellworm Lighthouse, which at 1:72 scale is just under 23-1/2″ tall.

6

Los Morillos Lighthouse built in Puerto Rico in 1882.


4

Pellworm Lighthouse built in Germany in 1906


3


The laser cutting allows for intricate details which are hard to get when cutting with scissor or knife as can be seen in the above close-up of the 1:72-scale Pellworm Lighthouse.

If you’ve never built a paper model, the lighthouses make a great introduction. For a more advanced model, check out the ship model kits from Shipyard. We have those in both regular Paper Model kits, which you cut out yourself, and Laser Cardboard Kits, which are larger scale boxed sets that include laser cut parts, metal cannons, rigging material, wooden dowels for the masts and yards, plus paints, brushes and fittings.

I know the Shipyard product line may seem a bit confusing at first, so if you have any questions, just feel free to email us or call us at 510-889-6000.

Keep in mind that we have close to 150 Shipyard products, with only a fraction of those listed on our website at this time, so if you’re looking for something, let us know, as we may have it, even if you don’t see it on our website. We’ll be working to get everything on line in the coming weeks.